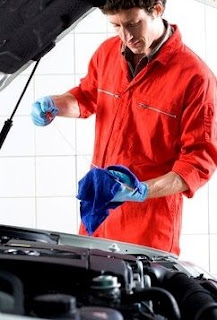
 Just as you would prepare yourself with the changing seasons, so does your car. You need to do some extra measures in order for it to withstand wear and tear and in order for you to drive safely and smoothly on the road.
Follow these simple steps to maintain your car’s pristine performance as you go through the seasons.
1. Summer
Schools out and time to party! The time for vacation, summer means a lot of traveling, family picnics, days at the beach or spend time at the games. Take note that before going out on your sojourns this hot time of the year, you need to check on a few things to make your car roadworthy.

1. Check for tire pressure and rotate your tires if necessary. See to it that your tires are properly inflated to the recommended pressure level to avoid blow outs. If you see uneven thread on your tires, you need to rotate them to extend thread life.
2. In case you might have skipped your car’s last tune up schedule, you need to visit your mechanic first and have a tune up before going on long trips. Have the mechanic also check your radiator for leaks or cracks which could cause engine temperatures to rise.
3. Check your engine coolant level and place more if needed. Due to high temperatures, your car could overheat so its best to maintain the exact amount of coolant every time. If also needed, have the radiator flushed and add in new coolant.
4. Inspect the air conditioning system of your car and replace worn out or damaged belts.
5. Change your car’s oil.
6. Check your car’s breaking system. With higher temperatures, your brake pads will wear quicker. It is best to have them checked to see worn outs and replace if necessary.
7. Always have the emergency kit on handy. See to it to have the toolbox with you including: flashlight, motor oil, windshield wiper fluid, coolant, tire inflator, jack and medical kit with you at all times for sudden road trouble shoots or mishaps.
2. Winter
Remember that the drop of temperature will take its toll on your car. Below are some preventive measures which will keep your car in top notch condition while protecting it from all the ice and tough road conditions.
1. Protect your car’s finish and water proof it by applying wax and constantly buffer polishing cream. This will help protect your car from moisture and corrosion while on the road.
2. Protect against engine freeze. Use anti-freeze coolant instead of the regular coolant for your engine. This will prevent engine freeze and eventual cracking of engine components.

3. Have your car tuned up. Visit your mechanic and have a tune up for the season. Have your belts, spark plugs and wires check for deterioration and change them if deemed necessary to avoid untoward road mishaps caused by a wore out belt etc.
4. Check your brakes. See to it that all brake pads are working at their maximum and replace worn out ones if necessary. This time of the year, maximum braking power is surely needed.
5. Replace your regular tires with winter tires. Depending on the graveness of road conditions, winter tires are a good investment to bank on for optimum safety.
6. Prevent gas line freeze. Use a winter fuel system cleaner for the prevention of gas line freezes in extreme cold weather conditions.
7. Use winter specialized washer fluid. Regular blue washer fluids will freeze up in the reservoir. Winter fluids will stay liquid in the washer reservoir at temperatures as low as 30 *F.
8. Always have your emergency kit on handy as well. Although routine maintenance may make your ride secure, bringing your emergency kit will certainly help in giving you peace of mind.
9. Remove snow and ice build up from your car before driving. To prevent visual obstructions while on the road, it is best that you thoroughly remove snow, fog and ice build up on your windshields before taking a ride.
10. Be updated with weather, road conditions and traffic reports in your area. Be in the know of alternate routes in heavy traffic or do not force yourself to drive if experts advise not to during severe weather conditions.
Look with caution for motorcycles which could suddenly cross your path.
Jovir Amatong
.jpg)


